joshua tree workshop 2018

Showing posts with label recycled material building. Show all posts

Tuesday, March 26, 2013

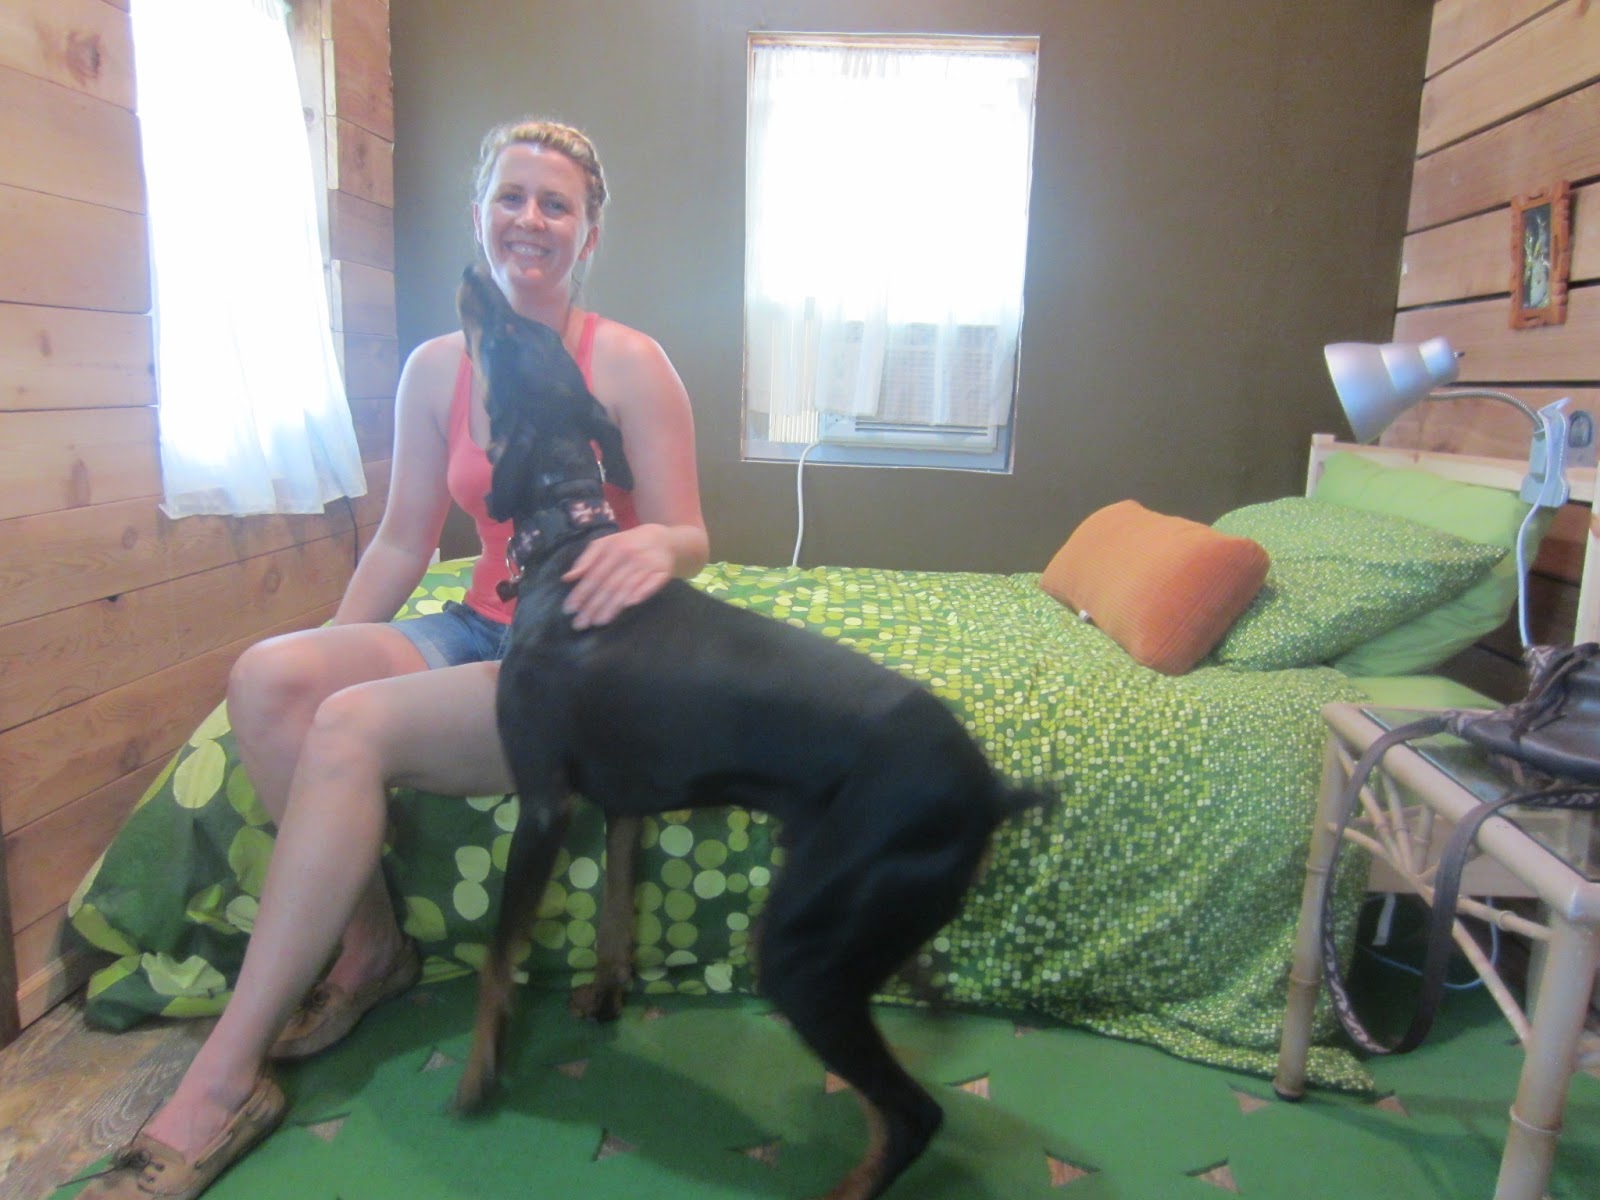
Jennifer Francis' tiny house/cabin (for rent) in Austin, TX


 Austin, Texas is pretty darn awesome.
     Its known by many as "The Live Music Capitol Of The World", but it certainly also deserves some credit for its forward and free-thinking citizens, and their love for unusual, and tiny, architecture. While down there to teach a two day tiny house building workshop for the Tumbleweed Tiny House Company, I was able to stay in two different tiny rentals/dwellings ("When in Rome..."), AND see a third. That third tiny house was a guest cabin built and outfitted by Jennifer Francis- one you can rent on airbnb.com for under $60!

The airbnb listing link... https://www.airbnb.com/rooms/658102

Jennifer is beyond friendly, a great host, and her cabin, while not fully complete, already exudes character. With its large columned front porch, its very reminiscent of the pioneer cabins of old. Her backyard is also very fun, funky, and private (she's at the end of a dead end street).

Here are some photos I snapped, and you'll soon see more (alongside the other cabins I saw, AND the workshop) over at www.TumbleweedHouses.com. 

 The interior wall siding? Fence Boards....


There is no bathroom (guests use the one in her main (also small) home), but she's working on that. Also, the opposite side of the tiny rental also has a mini loft (it wasn't finished, so I didn't photograph it).

Again, since its so new, check out our new facebook page/group over at www.facebook.com/tinyhousehub
 
-Derek "Deek" Diedricksen

Tuesday, March 19, 2013

Salvaged Window Greenhouses, Cabins, n' Micro Structures...

Check out some of these great looking, and inventive structures, all which have utilized many discarded (recycled) windows in one way or another. We'll actually be doing a demo on re-glazing windows at our North Carolina (Wilmington) Tiny House Workshops as well- April 26th-28th.

          Above: I just LOVE how the builder kept the original paint and stain color on each window......


From re-store.org
Photo from Houzz.com
wordever.com
A greenhouse cabin I built with recycled windows (and some homemade) for a MA-based horror author

 If you're looking to recycle free windows into a tiny house, cabin, or greenhouse, here's a video I did a little ways back on the subject- something we cover in the workshops for The Tumbleweed Tiny House Company too....


-Derek "Deek" Diedricksen


Monday, March 11, 2013

SEVEN funky and nearly FREE pallet coffee tables for your home- DIY Furniture

What I LOVE about furniture pieces like these is that they have a story behind them. I really enjoy being able to tell guests the tale and origin behind a diy project, art piece, or furniture item of mine when I get a compliment on it. Instead of "I bought it at Ikea", the lineage becomes a lot more interesting, and often makes for good conversation.

makezine.com
     Since I feel that saving money goes hand in hand with the tiny house movement, I thought that some of you might be interested in these SEVEN, funky n' free (and creative) coffee tables- all made out of free forklift pallets. I hope these give you some new ideas, or at least make you look at pallets (which are free just about everywhere) in a different light. I felt that these were some colorful and fun examples as well- enjoy....

from houzz.com

 
scraphacker.com

www.stelabird.com
www.imgur.com
-Derek "Deek" Diedricksen

Monday, February 11, 2013

More Cheap/Free n' Funky Decor for YOUR HOUSE- Part 3

Decorating for a Dime- LITERALLY....
(PS- our North Caroline Tiny House Building Workshop (April 26th-28th, 2013)  is almost SOLD OUT- so get movin' if you want a slot!)


 Shelves sagging under the weight of your insanely huge tiny house book and architectural-tome collection? Have no fear, "Super Thrifty Rustic Man" is here! No, I'm not cheap, I actually blow lots of money on eating out, travel, and many stupid things (bedazzled shoe horns, remote control whoopee cushions, snuggies), but I do LOVE creating things....even when its something as simple as THIS FIX....which is a great project with young kids too, as its so incredibly easy, and teaches them the value of recycling and, well, not being a lazy tub of goo.

RUSTIC STORM WOOD SHELF SUPPORTS

To do this properly, you want to have a stock of "squaw wood" (wrist thick, or so, limbs) that have been previously selected, and stored/dryed. Better yet, if they're stored indoors, they've already acclimated to the climate of your home in terms of expansion and contraction. It shouldn't matter TOO much if you don't do this ahead of time, but you run the risk of the wood expanding, or shrinking, by as much as 1/4" afterwards if you don't. That's up to you, especially if you're building something that needs to be "K.T.T" as I call it- "Kitchen Cabinet Tight". Also, drying and storing the wood gives it a chance to shed itself of the boring insects that already might be inherent in the wood when it was living.

Note: These branches are among many I saved and shaved/skinned from a large limb that fell in a storm about two years ago. I keep using these things for a variety of projects...BIRCH WORKS and LOOKS great too, but from a blight, we don't have many of them around here, so I usually spare those that I could have harvested.
---------------------------
Step 1: Carefully measure the lengths you need, and make 'em a hair longer....you want these to tightly fit into place so that they could almost be left in place on a gravity/pressure-fitting alone.

Step 2: I gave them a quick coat of Minwax Polyurethane- if there are any bugs within, this might kill them, or at least won't make them so happy. If stored/dryed properly, there should not be any powder post beetles, or anything in these though....be sure to look them over before using them. I've done this so many times and have never had a problem.

Step 3: Jam 'em into place and secure them with a mere brad from above, and a toe-nailed brad from below. Again, a tight fit should do most of the work for you, even without this tiny nail. You can use a dab of construction adhesive too, if you'd like.

Step 4: Never have to worry about your sagging shelf again. Commence reading and hoarding books.....

This tip is pretty unprofound, but I have many, many, many like it (but a bit more inventive/funky) in my book "Humble Homes, Simple Shacks"....if you might be lookin' for more!


 -Derek "Deek" Diedricksen

Wednesday, January 9, 2013

A Super-Cool Recycled/Salvaged Forklift Pallet Coat Rack

We've done it in past workshops, so I'd LOVE to mess with some recycled forklift pallet construction at our Wilmington, NC Tiny House Building Workshop- April 26th-28th (2013). If you haven't seen our list of guest builders and speakers for this three day workshop, its pretty insane! I can't wait! Click Here For More....

I've made something similar in the past- but not as colorful. I love this one, and you don't have to alter the pallet at all! You could also stuff things like winter hats and scraves in the open pocketed area behind the facade slats too. I'd also add a large plank up top to serve as a shelf for other items of framed photos....

This particular one comes from a blog called designdininganddiapers.com 

Here's another one from "Littlebitfunky.com" too....so many blogs, so little time...


More Recycled Material Shelving....if you missed our last video...


AND....For MANY more recycled material ideas....

-Derek "Deek" Diedricksen

Wednesday, January 2, 2013

SAVE a FEW HUNDRED DOLLARS while building your tiny house....

This is a topic I'll be talking about at my Wilmington, NC Tiny House-Building Workshop on April 26th- 28th- HOW TO SAVE THOUSANDS OF DOLLARS while building your tiny house, cabin, or travel trailer. We'll put some of these tips into action as we build a tiny guest house as well! There are a TON of tips I talk about, but let me drop one simple one on you by means of a question. First though, I want you to look at this photo....


Now ask yourself, "Did I notice that the floors are mere plywood?". Looks pretty darn decent doesn't it.
     By using plywood, and skipping a second layer of flooring (where applicable), you eliminate one step of work in the path towards your tiny house, the large chunk of time required to lay a tongue and groove floor is done away with (and the need for specialty tools), AND you're only buying plywood for the task.
     Now granted, you're going to have to buy better grade plywood than what you might have otherwise hid under a layer of fancy flooring, but you're saving a large wad of cash, time, and with a simple swabbin' of polyurethane, or some other protectant, these floors still look great! If you're worried about seeing seams, keep in mind that area rugs and furniture may be taking up half of the floor, visually, anyway.


I also love that the walls you see in this photo are structural, but with the addition of thick blocking, also become storage shelves- an age old trick.

Coming up, I'll also have alternate flooring techniques- ALSO money saving! A decent portion of these ideas are in the book "Humble Homes, Simple Shacks", but I've come up with a few new ones since that book was printed.


-Derek "Deek" Diedricksen

Tuesday, January 1, 2013

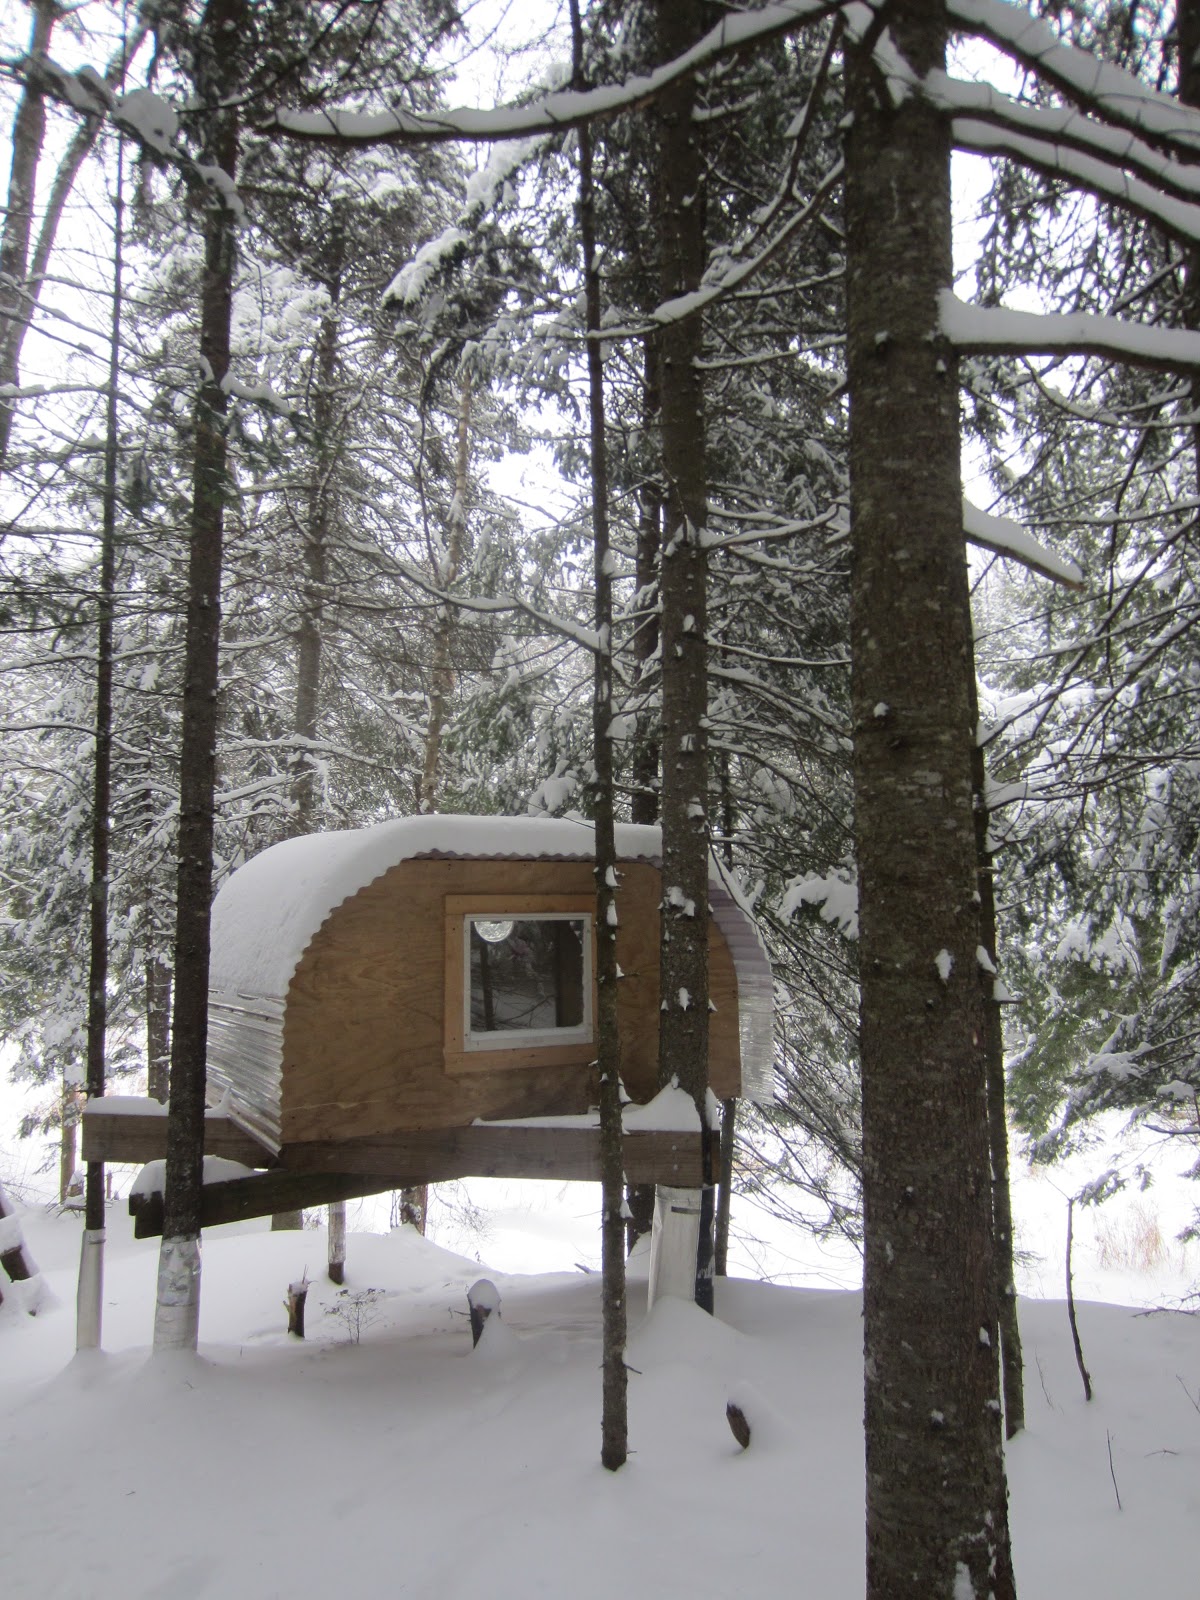
A Vermont Treehouse In The Snow....

Deep in the woods of Vermont......
The deck is made from ALL salvage wood, from a deck being torn down that I spotted en route to VT
I was up in the Northeast Kingdom (The "NEK") of Vermont at my camp over the weekend, and hiked out in the 18" or so of snow (tiring) to take a few winter shots of the tree house I built a few years ago for my brother Dustin. This tree shelter/fort has also since become micro-lodging for those who attend/attended my Tiny House Building Workshops, alongside the many other shacks, cabins, and tiny houses on the property- all of them off-grid, and none of them accessible by road.
     If you're looking to attend another one of our 3 day, 40-contact-hour, hands-on, building workshops, our next one will be April 26th-28th, in Wilmington, NC- its gonna be fun!!! kidcedar at gmail.com if you'd like to sign up.
     Below is also a video tour of this tree house/tiny shelter....a similar concept sketch layout is in my book "Humble Homes, Simple Shacks".


New Porcupine Damage.....

All photos by Derek "Deek" Diedricksen

Tuesday, November 27, 2012

Girl Power! The cool fort/shack/tiny house of Tyler Rodgers


'Love this little shack- and not just because of the letter that came with it....
    When people write me, and better-yet, show me photos of work they've done that was inspired by my blog, builds, and/or my "Humble Homes, Simple Shacks" design book, its just more than I could ask for, and makes me incredibly happy/thrilled. The whole point of that book was to get others to just get out there and start DOING and BUILDING, and I keep getting letters from readers that support the fact that it is, in fact, working, inspiring others, and well, getting them off their asses. Well, Tyler Rodgers, has been doing anything but sitting around. I've posted the letter she sent me, which goes on to describe her little recycled-material cabin.


Dear Derek "Deek" Diedricksen,

         I'm 16, and I am just starting to put the finishing touches on my first tiny house. I'm really happy with it, and just wanted to say thanks for all the inspiration that your blog has provided throughout the whole process. The whole thing is about 90% salvaged materials. All of the wood except the 2x4 framing and plywood roof piece came from a dock that was being torn down in one of my friends' neighborhoods. That was where I got really lucky. So much free lumber! I bought each of the two windows from the Habitat for Humanity store for $5.
         I based my design on kind of an enlarged version of your "Hickshaw" design, but really wanted to build in the spirit of the "Gypsy Junker", in terms of spending as little money as possible. Really, I can't say enough on how much your blog has helped. It helped me realize that building a tiny house is totally doable and relatively inexpensive if you are willing to search for free materials.


      Building the house was great, but I also just love hanging out in it. I feel like a bunch of people believe that these kinds of structures will make them claustrophobic, but my house is now one of my favorite places to relax. After reading your post about hammocks, I bought one and hung it up, and now I can sit in it for hours and read or nap. I angled the house so that the windows would frame the view of the tidal creek next to it. I also just finished putting in a skylight, which allows in some additional light and can be opened in the Summer for more ventilation.


      Now I'm looking forward to caulking up all of the spaces between the boards, just to make the whole structure a little bit more water-tight. I am probably also going to add more shelves, and might paint the outside, although the unpainted look has really grown on me. Again, your blog was a tremendous help.
                                  Thanks, Tyler
 --------------------------------------------------

Monday, November 26, 2012

The Natural Zome/Dome of Stuart "Jeffrey" Hart

I'm a huge fan of building with recycled materials (especially free/salvaged ones)- we'll talk about this, and DO IT, April 26th-28th at our Relaxshacks.com Tiny House Building Workshop in Wilmington, NC- so a guest post from Jeffrey, a reader of my blog, and a natural builder, was certainly welcomed....

Here's what Jeffrey has to say.....

The project began with an idea: by reducing the size of a house, we actually increase the space we live in. Having a smaller home forces us outside and into nature.
My aim was to make a well built cabin cheaply; using material destined for the landfill as much as possible. I feel that much of the western world has become a 'throw-away' society. No longer do we repair our belongings when they wear out or break, but instead we thrown them away and buy new ones. I think knowledge of the value of materials is being lost. Building in this way also forces me to use techniques and materials I am not familiar with, so increases my ability and knowledge.
I wanted the cabin to be small, with room enough for only a bed, desk and small wood stove for winter heat.

I decided on the geodesic dome as the shape for my cabin. I stayed in a beautifully crafted 30-foot wide dome house a few years ago in Dunster, BC and it made a deep impression on me. The lack of empty corners meant that I felt enveloped by the space in a unique and comforting way. For more practical reasons, the dome structure could cleverly be produced from reclaimed materials, so it was the ideal design solution.


Aprovecho (http://www.aprovecho.net/), a sustainable education and research center in Oregon gave me permission to build my cabin on their land.
To begin the project I constructed a nine-foot ten sided deck using wood salvaged from a torn down shed and concrete pier blocks that were found on site. I built small walls, known as 'pony walls' to raise the dome so the occupant could stand in the middle. I then built the dome structure from pallet wood fastened together using plumbing wire around hubs made from PVC pipe. 

I decided to add a roof on top of the dome for a number of reasons: I worried about effectively waterproofing all of the dome’s angles; I wanted to provide some shading for the windows in the summer; and I wanted to earthen plaster the outside - so I'd need an overhang to protect the plaster from the long Oregon rainy season.
To waterproof the roof, my plan was to use an old billboard canvass. Sadly I wasn't able to track one down before the rains were upon us, so I had to succumb and purchase tarpaper.  I finished the roof with salvaged cedar shakes. A friend had collected a pile of semi-rotten shakes with the intention of using them as fuel. He was happy to let me rummage through them until I found enough good ones to finish the roof.

To insulate the dome I used a combination of materials. I reclaimed rigid foam from a pile of deconstruction waste. After I ran out of that I used a “slip chip” made from wood shavings coated with clay slip and packed into a form. I was also interested to try using sheep’s wool as insulation because it is a natural, inexpensive insulating technique and sheep are abundant in the area. At a farmer’s market, I learned about a local woman who let me swap a days work on her land for six bags of her sheep's wool. I then washed the wool to clean it, carded it to fluff it up, then sprayed it with borax to prevent insect infestation.

To finish the outside of the dome I collected vine maple from the surrounding forest and bent green branches around the structure. This acted as lathe to hold the earthen and lime plaster I smeared on as a protective skin.
I put siding on the pony walls in traditional board and baton style. I had left this detail for last because I wasn't sure what material to use. Then I happened upon some off-cuts from a neighbor building a bathroom addition that just happened to be the exact size I needed, so the design finished itself.
I improvised lathe for the inside using some pegboard (with the smooth side against the insulation) reclaimed from a workshop. Next I held a workshop to teach earthen plastering both to educate some of the Aprovecho interns and to complete the big plastering job in one day.
Earthen plaster is often associated with smooth rounded corners, but I thought it would be fun to buck that trend and keep the triangles that make up the geodesic shape visible from the inside. The Earthen plaster was a mix of clay dug on site, plus sand and straw which was left over from a natural building project at Aprovecho
I wanted the outside to have a rustic feel and blend into the landscape, but once inside, I wanted a high-quality finish. Even though I made the cabin from reclaimed materials, I didn't want the occupant to feel like they were living in trash, but instead surrounded by beautiful things that our society is too lazy to take the time to reclaim and restore.
To finish the inside, I paneled the pony walls with exterior siding salvaged from the same shed deconstruction as the decking. I spent a long time planing and sanding the siding to reveal the gorgeous wood grains. Then I finished them with linseed oil and bees wax.
I built the bed and desk from pine felled and milled on site. Aprovecho’s forestor, Matt, selectively harvests only a few trees a year to keep the forest healthy and logs them mostly using horse and human power.
I curved the desk edge when I realized there was not a single curve in the entire building! 
Finally, I constructed the door from the remains of an old goat shed and finished it with a porthole made from the only dimensional lumber in the build: a lumber delivery sticker. 
I ran out of time before I could put in windows, but the cabin is livable for three seasons even without them. I plan to return and enlist the help of a local glasscutter to make triangular windows. 

 
Due to fire restrictions on site I never installed the stove I had planned to put in.
The total build took about 2 months and I ended up spending about $200 on screws, nails, tarpaper and sand.
 I was very fortunate to be building at Aprovecho and have access to their workshop, lumber and expertise. In the nearby town of Cottage Grove, an active and like-minded community gathers weekly for a farmers market in the local used book store. Those who I told about my project often offered materials, ideas or a helping hand.
If you are trying to build from reclaimed materials, being open and excited about what you are doing and speaking to whoever will listen is a great starting point for gathering materials. I'd also recommend keeping an eye on craigslist and community forums and dumpster diving. Also, sometimes simply asking for offcuts at constructions sites pays off.

While working on the dome I began to think about “pod living”. Sleeping in a “pod” bedroom like my dome and having central cooking, bathroom and social areas. Possibly having many pods in a co-housing style housing arrangement. This would mean the occupant must go outside and interact with the world around them more often, encouraging a lifestyle that is more connected with nature. For example, going outside between waking and eating breakfast allows them to notice the small, everyday changes in the seasons and catch many more of the special moments in a day: The brisk dawn, migrating birds or a salmon sunset. 
When talking about this idea, many people bring up the cold and rainy days.
These are the days when you would normally never venture outside, and so you miss many of these moments.
I also see pod living as a possible solution to my generation’s dilemma of home ownership. How do we live in our own homes without building up crushing debt and being stuck in jobs we hate for most of our lives. What if you could build a small affordable pod and join a like-minded community? 
My cabin works well as a pod at Aprovecho, where the occupant has access to a communal kitchen, laundry and living spaces. I believe it functions best as part of a larger communal living situation

You can get more info on this and other projects at http://www.jeffreythenaturalbuilder.com


For more on recycled-material or "Salvage" construction, check out my book "Humble Homes, Simple Shacks".....

Sunday, November 25, 2012

Lynn Knowlton's Recycled Material Tree House/Tiny House Getaway

NOTE: For all you tree house fans out there, the next cabin/tiny house design we're tackling, and actually building, is a design also double-intended for possible tree home use because of its light weight, paneled/pre-fabricated construction (we'll do it all on site- from scratch), and ease of set-up. We'll be working on this project as a group in WILMINGTON, NC, April 26th-28th, as part of another Relaxshacks.com Tiny House Building Workshop that I'm hosting. Steven Harrell of tinyhouselistings.com will also be co-hosting this event. Many guest speakers are also soon to be announced. CLICK HERE for details and to sign up....


Made almost entirely from recycled materials by Lynn Knowlton, and located outside of Toronto, this tree house/tiny house in a tree serves as a getaway, entertaining spot, and guest quarters, but it could also make for a very nice all-around tiny house/actual home as well. I especially love the attached slide, and the simple awning-style windows.

Again, for my upcoming follow-up book to "Humble Homes, Simple Shacks", we're looking for some owner-built (or photos of those you took) tree houses, forts, tiny houses, shacks, shed offices, and more- email them to kidcedar at gmail dot com, and you just might end up showcased (and credited, of course!) in the book.


-Derek "Deek" Diedricksen

Wednesday, October 3, 2012

More Cheapo Stained Glass Windows for your Tiny House/Shed/Cabin!

Again, I never really go out of my way to look for the stuff, it just happens to cross my path and spark an idea.....or twelve.....or maybe its just the caffeine talkin'?


Aside from building a tiny guest sleeper/cabin on a trailer bed (I just bought one), and messing with MANY alternative construction, and recycled-building ideas at our Relaxshacks.com "Tiny House-Building (Hands-On!) Workshop (3 Days!)" on November 2-4 in Stoughton, MA AND touring many tiny shelters, Jay's FIRST Tumbleweed Tiny House, The Whittled Down Caravan, Mariah Coz's "Comet Camper", and more, we'll be tweaking a lil' seasonal guest cabin I once built for The History Channel (see video below), that was dubbed "The All Eights Cabin". This cabin was also featured in my book "Humble Homes, Simple Shacks". It was a rushed project- two days to design, pre-build, haul to NY, and assemble- but all things considered, I love the way it came out- yet I feel there are many improvements we can all make together- and ideas on its layout that we can come up with collectively. I'm talking fun, out-there, daring, no-one's really tried this stuff before, improvements and design approaches. 

One being some new, and funky/colorful/bizarre windows- and do I ever have a collection of stuff that we can pick from! This former stained glass trinket/jewelry tray (at a Boy Scout tag sale for $1.00) is yet another item we might make use of! Wine Bottle windows? Recycled refrigerator glass shelves, vintage window sashes, old school glass punch bowls, slider doors? Yup, we got 'em all....

We have about two or three slots left for this workshop, as we want to keep it capped at twenty or so people so as to make it intimate, SO, if you're interested, don't wait too long. kidcedar at gmail dot com

CHECK OUT THE VIDEO HERE

-Derek "Deek" Diedricksen